我们在之前分析拦截器的文章中提到,Alamofire中实现了一些比较常用的拦截器。AuthenticationInterceptor绝对是满分(我打的分 🤣)实现之一。今天一起来拜读一下。
和
AuthenticationInterceptor类似的还有RetryPolicy,也可谓精辟。具体内容放在下篇展开,敬请期待。
面临的问题
在实际的项目中我们经常遇到的问题是:部分 API 是需要授权之后才能够访问。例如:我们获取用户信息的接口api.xx.com/users/id,需要在请求头中添加Authorization: Bearer accessToken以完成授权,否则服务器会返回401拒绝我们访问。这个accessToken会有过期时间,过期后我们需要重新获取,一般是通过登陆接口返回。后来为了减少用户登录频率,和accessToken一起返回的还有refreshToken,它的有效期会比accessToken稍长,可以使用它来对accessToken进行刷新,就可以避免用户登录操作。
这里涉及
OAuth2.0以及JWT相关背景知识,不了解的同学自行解决哈。
那么对于上面的需求,我们客户端需要做的有哪些呢?具体如下:
- 获取
accessToken和refreshToken - 在后续需要授权的接口中添加请求头
accessToken过期后,使用refreshToken进行刷新- 刷新
accessToken失败时,需要用户登录重新授权。
那么Alamofire为我们做了哪些?继续看 😁
如何解决
首先,我们可以定义一个自己的凭证(也就是后续需要用到的认证信息):
1 | |
其次,我们再实现一个自己的授权中心:
1 | |
之后,我们就可以使用框架内部的AuthenticationInterceptor了:
1 | |
可以看到,使用上面的方式,我们只需关心如何获取accessToken和refreshToken,以及在refreshToken也失效时触发用户重新登录授权。可以说,我们自己的工作少到了极致。自己写的少就意味这 bug 少,特别是刷新 token 这一块,什么时候应该刷新accessToken、怎么控制过度刷新这些繁琐的部分我们都无需关心了。
如何做到的
知道了怎么做,可能你还会一头雾水。为什么需要定义那两个数据结构?这一部分为你解答。
AuthenticationCredential
它代表授权凭证,这个协议的定义很简单:
1 | |
该协议只关心这个凭证是否需要刷新。对于不同的授权方式,需要的元信息也不相同,框架无法也无需知道这些细节。
Authenticator
正因为AuthenticationCredential可能五花八门,这里需要一个知道如何使用它的角色。Authenticator就来了。该协议的实现细节比较多,我已经写在注释里了。
1 | |
AuthenticationInterceptor
为了完成授权流程,该拦截器对请求的适配和重试都进行了实现。
Adapter
先上一个适配流程图:
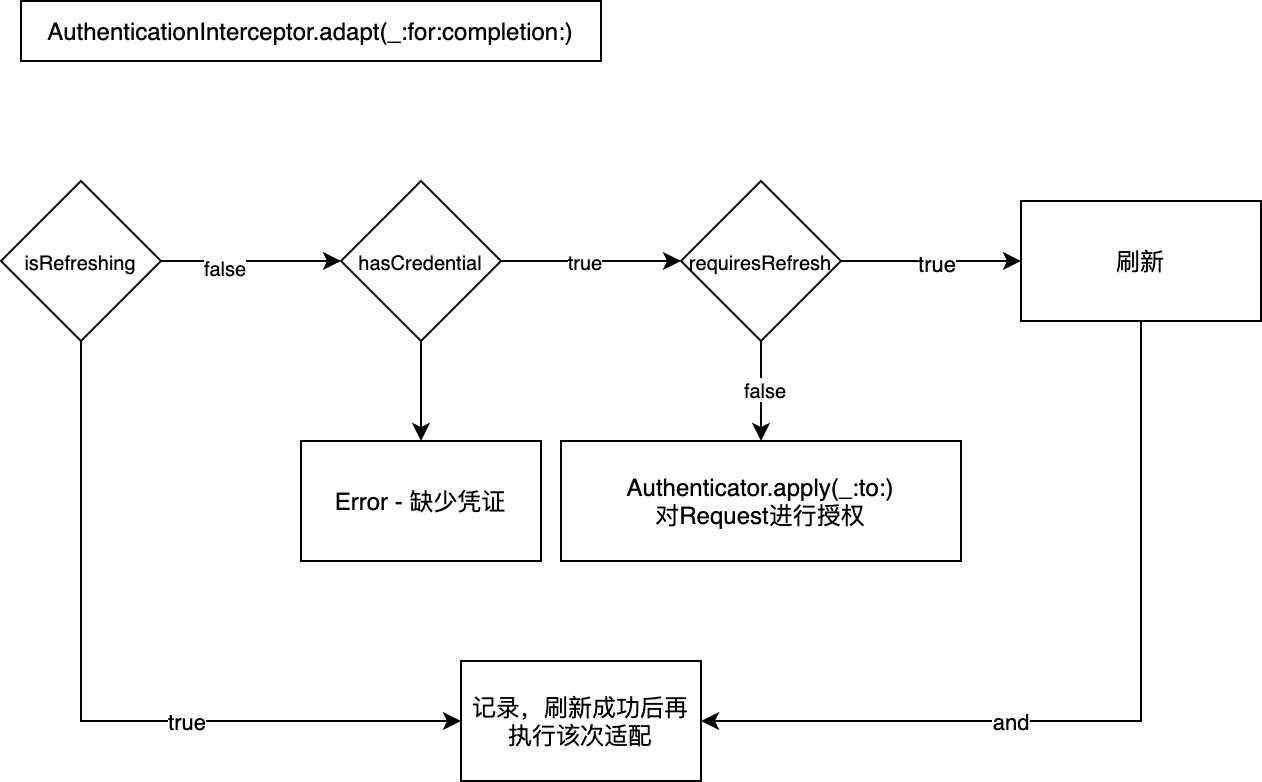
下面是相关代码,我已经加上了详细注释:
1 | |
其中的刷新流程,比就有意思。涉及到刷新窗口的概念。简单讲就是一定的时间范围。在这个范围内,还可以设置一个最大的刷新次数。在正式刷新之前,会判断刷新条件是否满足窗口设定。具体如下:
1 | |
若上述条件通过,就会执行刷新:
1 | |
Retrier
还是先看流程图:
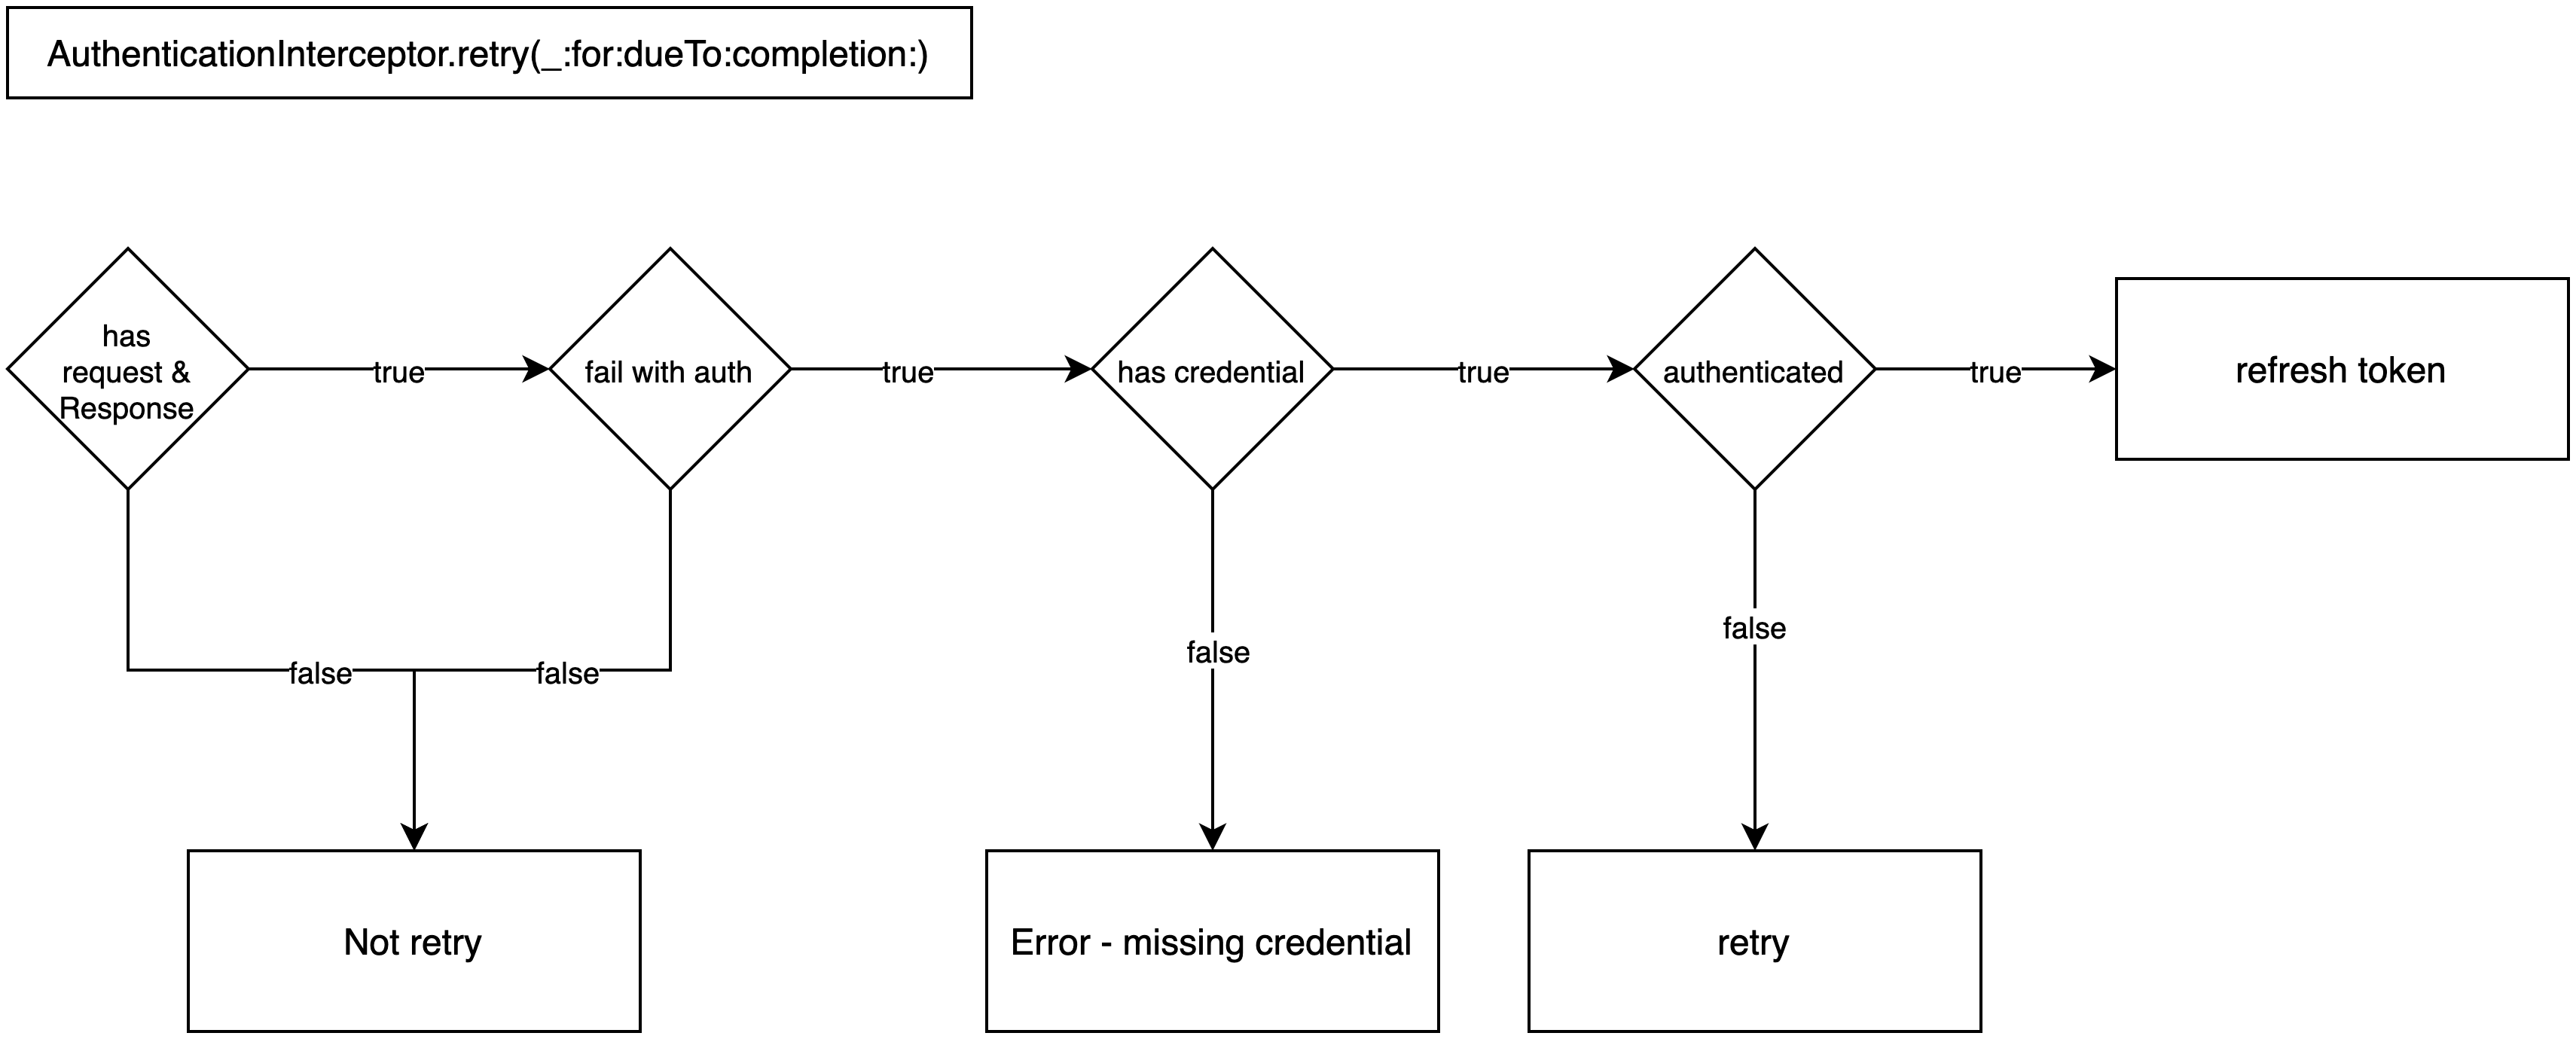
这里会判断是否和授权有关,无关的就不会重试。另外,若当前最新凭证没有使用,会进入重试流程。最后的刷新是因为:既然需要授权,也存在凭证,也授权过了,还进入了重试那就说明凭证过期了。下面是具体代码:
1 | |
到这里,整个流程也就清晰了。更具体的,可以参考GitHub
总结
今天我们从具体问题出发,先了解了如何使用Alamofire去解决该问题,然后又分析了AuthenticationInterceptor的具体实现,它是如何解决该问题的。最后,只能说Alamofire真是太细了 😂。